


ARCTIC PREPARDNESS
Arctic Travel The most dangerous way to travel across the Arctic ice or across open tundra in polar bear territory is to travel alone, on foot or skis. It is far safer to travel in a group, by snowmobile or dog team. The faster speed of traveling by snowmobile or dog team - as opposed to skiing or hiking - makes it less likely that a polar bear will approach. Bears rarely approach snowmobilers as the noise and smell of exhaust fumes drives them away. The slower speed of a lone skier causes bears to approach out of curiosity. A curious bear can quickly turn into a dangerous predator. In camp, the multiple voices of a barking dog team serve both as a warning and as a deterrent.
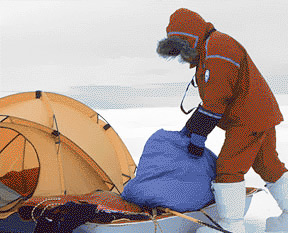
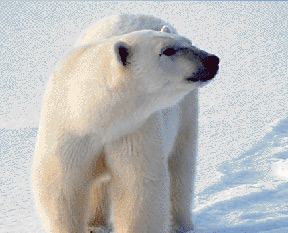
Setting up camp A bear usually avoids a group of people. Bears without cubs normally travel and hunt alone and are not used to seeing groups of people. Even two people are far safer than one as we proved when Bill and I skied to the magnetic North Pole four years after I had gone alone to the Pole - we had far fewer encounters with curious polar bears. When skiing alone to the magnetic North Pole, I traveled with Charlie my polar bear dog at my side. His only job was to watch for bears, warn me, and on one occasion chase an attacking bear away. He was an Inuit dog and had grown up around polar bears all his life. After he returned home with me he also protected Bill and I from grizzly bears when we were hiking in the Northwest and Alaska. Such a companion is invaluable in polar bear country when traveling on foot. Never forget that polar bears are fast, intelligent and always looking for food. The Arctic traveler must be prepared in case of a polar bear confrontation.
Bear Equipment for Arctic Travel
Flare gun: a hand held pistol grip flare gun and a plentiful supply of flares. This non-lethal equipment has proved its value many times when a determined bear has approached with no sign of retreat. We fire the flares to land a few feet in front of the bear. Practice at home so that your aim is perfect, as you NEVER want to land a flare behind the bear. This could send the bear forward toward you. When practicing make sure you fire flares in an area of no fire danger as they can ignite dry vegetation.
Trip rope and bear bells: a lightweight rope long enough to reach all the way around the camp site about 50 feet out from your tent and several bear bells. These bells are small bells used in grizzly and black bear country and can be attached at intervals along the rope. If a bear approaches and encounters the rope, the resulting ringing sound of the bells is usually enough to scare a bear off and warn the tent's occupants of their approach.
Trip wire: an alternative to a rope and bear bells is a trip wire. The wire can be connected to an explosive flare that produces a sudden bright light that surprises and scares the bear. The wire should be strung about 3 feet high above the ice or ground at least 50 feet away from the camp.
 Dog team: when traveling by dog-team, the dogs should always be tied up fairly close to the camp so that their warning barks will alert the tent occupants.
Night-time sentries: Once when traveling through a particularly large population of bears we took turns guarding the camp throughout the dark night hours.
Emergency GPS tracking device: In a crisis an emergency signal can be sent to a rescue operation. The device sends signals via satellite to a rescue service center. It automatically provides your position and enables the rescue service to reach you as quickly as possible. A satellite telephone, although an excellent communication device, is much more expensive and is not set up to quickly set emergency signals.
Dog team: when traveling by dog-team, the dogs should always be tied up fairly close to the camp so that their warning barks will alert the tent occupants.
Night-time sentries: Once when traveling through a particularly large population of bears we took turns guarding the camp throughout the dark night hours.
Emergency GPS tracking device: In a crisis an emergency signal can be sent to a rescue operation. The device sends signals via satellite to a rescue service center. It automatically provides your position and enables the rescue service to reach you as quickly as possible. A satellite telephone, although an excellent communication device, is much more expensive and is not set up to quickly set emergency signals.
Firearms as a last resort: a 12 gauge, 3-inch magnum shotgun with slugs and 00 ("double aught") buck shot. Shooting a polar bear has to be a last resort. Unfortunately it must be a "shoot to kill" situation because a wounded polar bear will make your situation far worse. It is important that an Arctic traveler is proficient in handling and firing a gun before leaving home. Always keep a firearm and flare gun within reach, whether in camp or away from camp. Don't keep a firearm inside a warm tent where the warmth could create condensation, which would freeze when exposed to low outside temperatures and perhaps freeze the firing mechanism. We kept our guns close by in the tent vestibule but close enough in case of urgent need. Before leaving for the Arctic we always clean our guns of all oil and use graphite as a lubricant. In extreme cold oil can cause a firing mechanism failure. Be aware of, and obey the laws regarding the killing and injuring of polar bears.

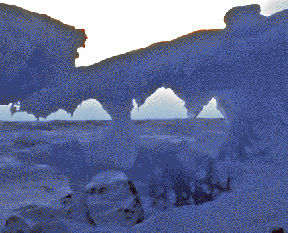
Camp Location If at all possible, camp in an area where there is good 360-degree visibility.
Obtaining Water from Snow and Ice In cold dry climates it is important to drink water even if you are not thirsty to keep your body properly hydrated. When traveling in snow country it's always best to melt snow on your stove for drinking water. Start by placing some water in the pan and then slowly add the snow. It will melt faster and the heat won't burn your pan. However if at all possible never eat snow. Eating snow lowers your body core temp very rapidly, much faster than your body can compensate for. Because snow chills the body from the inside out you need to eat an incredible number of calories in a hurry to provide the energy your body requires as it tries to compensate for dropping body core temperatures caused by the cold snow. In a survival situation, where food might be in short supply, the inability to warm the body can cause hypothermia and death. Melting snow in the mouth also can cause blisters and cold burns. When traveling in the Arctic or winter snow country we always carry several small-sized freezer zip-lock bags and if short of water we fill a bag with snow and put it in an inside pocket. Our body warmth soon melts the snow. If there is sun, place the snow in a black plastic bag and leave it in the sun. The black color will absorb the sun's heat and melt the snow. If traveling across the Arctic Ocean ice pack, don't eat any gray colored ice. It is new ice and contains salt. It will worsen thirst and cause dehydration. Look for white, older ice. As the ocean frozen ice ages, the salt drops to the lower layers of ice leaving the older, upper layer free of salt. At night fill a drinking water bottle with a reliable cap with snow. Place the bottle inside your sleeping bag and your body heat will soon melt the snow.
Food Cooking and Storage Never feed bears. Never leave food at the campsite that they can find. If a bear finds food at your campsite after you have moved on, it could follow you, especially if you are downwind of the bear. Always leave a clean campsite. Take all garbage with you. You can't effectively bury garbage in the Arctic. A polar bear has an extremely acute sense of smell; it is important that foods such as sardines and other strong smelling meaty foods are avoided. Store left over food in sealed plastic bags and if practical store the bags away from the tent site. Stay away from any carcass even you can't see a polar bear in the area. Bears defend their food and can appear suddenly out of nowhere. Be conservative with your curiosity - remember you're in their environment.
Lighting a Fire on Snow or Frozen Ground at Low Temperatures Although Bill and I always take a small backpacking stove and fuel, it's a good idea to know how to light a fire in an emergency in snow country. When skiing or snowshoeing in the Cascade Mountains in winter, our emergency equipment includes:
- A cedar shingle (the same that is used in house roofing) that can be split into strips of wood as a fire starter. A shingle weighs very little, lights easily and burns hot.
- A tube of fire starter paste
- A small zip lock bag of cedar shavings
- A sharp knife to split the cedar
- Long waterproof easy-to-light matches
- Cigarette lighter
- Goat's Beard Lichen
First find a sheltered place out of the wind and dig a pit down to the ground if possible. Remember that a fire will melt the snow under and around it and will eventually drown itself out. If the snow is so deep you can't reach the ground, build the fire on a platform of green branches above the snow; this will raise the fire above the frozen earth and act as a platform on which the dry branches can burn. To keep the fire free from falling rain or snow, have your companion hold a jacket over the area, or rig a tarp over the fire to keep all fire material dry. Gather a pile of small dry sticks from dead wood, larger dry sticks and larger pieces of wood. Green wood won't burn easily. In the Pacific Northwest and the Cascade Mountains there is a lot of moss in the forests called "goats beard." If it's reasonably dry it makes excellent fuel. After splitting the cedar shingle into narrow strips, spread the fire starter paste over the wood and light it. Add the shavings. When the fire is well established you can add small green sticks if there is no more dead dry wood.
Crossing Frozen Lakes and Streams Ice conditions and travel safety change from year to year. Always check with local ranger stations for information regarding the current year's ice conditions. Before stepping onto any ice, use a ski pole or long branch to probe the ice for strength and thickness. Fresh water ice that is two inches or more in thickness should be safe, especially if you are wearing skis or snowshoes that distribute your weight. If possible travel single file and several yards apart. Animal tracks are a good indication of ice strength. Deer normally cross where the ice is stronger - follow their tracks. If possible follow a shady course where trees or high banks shelter the water from the sun. Avoid areas where streams enter the lake or river. Moving water prevents the ice from forming a thick, strong layer. Also avoid areas where the water course narrows. These are often areas where the water current moves faster and the ice is thinner. Always pay attention to what's ahead. Watch for surface water that can indicate a nearby hole or crack and any change in the color of the ice. Dark areas could indicate thinner ice or fresh, weak ice. Stay away from rocks protruding above the ice. The surrounding ice might be thinner due to radiated heat from the rock. Often the current is swifter around large rocks. If you do fall through the ice, drop your grip of a ski pole down close to the pointed end and use it as a grip to claw your way back up over the edge of the ice. Once on top, stay prone and slither across spreading your weight as much as possible until you reach thick, stronger ice.
Cold Weather Clothing System Foundation layer skin-hugging top and pants (long johns) made of synthetic moisture- wicking fabric. Damp clothing in a cold climate reduces insulation significantly. It is very important that the inner clothing layer wicks sweat away from your skin and clothes. Damp clothes become a factor in hypothermia. Some modern synthetics are treated to prevent the build up of bacteria.
Blaclava head covering Here's what we take:
- A synthetic half zip sweater with a long back that stays tucked in and protects the lower back. The zip provides adjustability.
- Pants of medium weight windproof fleece with extra windproof front thigh panels
- A wind proof fleece vest
- A wind proof full zip fleece jacket
- Wind proof outer shell jacket with hood and close fastened cuffs
- Wind proof pants with full length side zippers
- A goose down jacket and hood for extreme cold and for wear during breaks
- Hat system consists of medium fleece helmet liner with fully insulated windproof cap that includes insulated ear flaps plus a down insulated hood
- Balaclava and face mask.
- Gloves - thin liner glove, medium lightweight glove, heavy insulated mittens, windproof shell mittens (Note: mittens are warmer than gloves)
- Socks - thin liner socks, warm socks, vapor barrier socks. Don't wear so many pairs of socks that they cramp your feet and toes and cut off circulation, which can lead to frostbite.
- Boots - lightweight breathable insulted boots with good traction. Don't wear waterproof boots. Ice will form on the inside if the boots can't breathe.
Before You Go
Cold weather tents Extreme cold weather tents should be designed to withstand high winds. Snow flaps are essential so that snow can be piled on the flaps to help stability and prevent wind from entering the space between fly and tent body. Several modern tents are constructed with the fly and tent body connected so that the tent is erected in one piece. This saves time and energy at the end of a long hard day. Internal pockets are handy to store odds and ends. When selecting a winter tent remember that clothing is bulkier and occupants require more room to dress. A dark fly color helps absorb whatever heat there might be, but we like a bright yellow interior. Yellow brightens a stormy day when travel is impossible. A roomy vestibule is handy for boots and objects that don't need to take up room inside the tent.
. . . . . . . . . . . . . . . .
Sleeping Bags After several nights in extreme cold weather, ice can build up in the insulation of sleeping bags making them heavier and colder. An internal vapor barrier and breathable non-waterproof outer covering helps alleviate the problem. The objective to never allow moisture to enter the bag's insulation because it will then freeze when exposed to low temperatures outside the tent. Inside the tent, we always keep our sleeping bags in the stuff sacks until time to sleep. This prohibits the sleeping bag from absorbing humidity from cooking or moisture inside the tent. There are several sleeping bag insulation materials to choose from. Goose down provides the most warmth for the least weight and bulk. The higher the number rating of the goose down the more down insulation is put in the bag. For sub-zero a fill rating of 900 to 1000 is best. A three-season bag should have at least a rating of 600. The negative side of a down bag is that it is useless when wet. However, with a built-in vapor barrier, breathable outer covering and by avoiding exposure to excessive humidity, goose down is excellent. Synthetic insulation has the advantage of not losing all insulation warmth when wet and it dries fairly quickly. However on the negative side it is bulkier and heavier. When choosing a sleeping bag it is always better to have a bag that is too warm rather than one that is cheaper but keeps you shivering all night. Considering that your life could depend on a warm sleeping bag your dollars will be well spent on the best bag available.
. . . . . . . . . . . . . . . .
Cold Weather Clothing Wool and goose down used to be the choice for cold weather clothing. However, synthetics have come a long way and are now the preferred fabric for most. Which ever insulation is chosen clothing should follow a layered system so that clothing can be easily adjusted according to activity, air temperature and wind chill. Clothing consisting of several layers traps warm air between the layers. This is far better than a single, thick heavy layer. In extreme cold conditions all clothing should be breathable. Read what we take in the main body text.
. . . . . . . . . . . . . . . .
Water We can survive many days without food but not more than twenty-four hours without water. When the temperature is low, you may not feel thirsty, but it is still important to stay hydrated. Arctic and mountain snow areas usually have an abundance of water but much of it is be frozen. You won't need to pack in a lot of water if you use reasonable care in melting snow and ice on location to provide fresh water.
. . . . . . . . . . . . . . . .
Food A diet high in complete carbohydrates with adequate protein is important. Breakfast: We eat cereal mixed with water and milk powder and dried fruit with a high carbohydrate drink, water. Daytime: nuts, dried fruit, crackers, peanut butter mix, food bars, water. Dinner: instant rice, freeze dried vegetables, hot chocolate, water.
. . . . . . . . . . . . . . . .
Shared Travel Plan Before leaving home always leave a travel plan and date of return with a reliable person. If you are taking medicine include a note concerning dosage and timing with your supply in case of emergency when someone else has to administer medication. Review current personal GPS tracking devices and consider buying one. [See our page on GPS trackers]
. . . . . . . . . . . . . . . .
Eye Protection For eye protection, don't forget sunglasses for bright sunlight on warmer days and goggles for the wind and snow. Goggles that fit snug against the face with no gaps to let in cold wind or snow are vital. They should be UV inhibiting to safeguard your eyes from UV radiation and allow clear vision. There are three variants of UV radiation, UVA, UVB and UVC; your goggles should provide 100% UV protection against all three.
. . . . . . . . . . . . . . . .
Cameras in the Cold At very low temperatures all batteries lose power. When you are outdoors in cold weather, carry your camera close to your body, for example, under your coat. Let your camera share your body warmth except for those brief moments when you are actually taking a picture. Keeping your camera protected and warm will also minimize the possibility of a manual shutter sticking because it freezes. Bring spare batteries with you, in a pocket, when you go outside. Digital camera batteries are fairly small and inexpensive - so take plenty - at least double what you might use in normal temperatures. When it's time to come back into a warm environment, condensation can be a problem. Moisture from the warm air condenses on the cold surfaces of your camera. The lens can become completely covered with moisture, as can the mechanical and electrical components inside the camera. You don't want moisture – water! – covering the camera. Let your camera warm up slowly. Put the cold camera in a plastic bag. The moisture will settle on the outside of the bag rather than on the camera.
Preparedness is the brother of survival.
Back to Prepardness Index